Triggering Task Runs
Kick off runs of registered workflow tasks.
After you create a workflow and register tasks, you can start triggering runs of those tasks from your own apps and agents.
You can also manually trigger runs in the Render Dashboard and CLI to help with testing and debugging.
First: Create an API key
Triggering task runs from code requires a Render API key.
Create an API key with these steps, then return here.
Running with the Render SDK
The Render SDK is currently available for TypeScript and Python.
SDKs for additional languages are planned for future releases. To execute tasks from other languages, use the Render API.
Follow these steps to execute task runs from your code using the Render SDK.
1. Install the SDK
From your TypeScript project directory:
(Or pnpm install, bun add, etc.)
If you already have the SDK installed, make sure you're using version ^0.5.0 or later:
After installing, make sure @renderinc/sdk is listed as a dependency in your package.json file at version ^0.5.0 or later.
From your Python project directory:
If you already have the SDK installed, make sure you're using version 0.6.0 or later:
After installing, make sure to add render_sdk>=0.6.0 as a dependency in your application's requirements.txt, pyproject.toml, or equivalent.
2. Set your API key
In your application's environment, set the RENDER_API_KEY environment variable to your API key:
The SDK client automatically detects and uses the value of this environment variable.
Alternatively, you can provide your API key explicitly when initializing the client (see the SDK reference for your language).
3. Initialize the client and trigger a run
The following code demonstrates initializing the SDK client, triggering a task run, and waiting for the run to complete. See below for more details.
You trigger a task run by calling the client's workflows.startTask method. This method takes the following arguments:
| Argument | Description |
|---|---|
|
|
The slug indicating the task to run, available from your task's page in the Render Dashboard:
Every task slug has the following format: For example: |
|
|
An array containing the task's input arguments. Elements are positional based on the task's function signature. The For tasks that take zero arguments, provide an empty array, |

The workflows.startTask method returns a TaskRunResult as soon as the run is created. This object provides the run's taskRunId immediately. You can call await result.get() to wait for the run to complete and obtain the full task run details (including status and results).
For full options and details, see the TypeScript SDK reference.
Use this method in asynchronous execution contexts (such as FastAPI route handlers).
The following code demonstrates initializing the async SDK client, triggering a task run, and waiting for the run to complete. See below for more details.
You trigger a task run by calling the async client's workflows.start_task method. This method takes the following arguments:
| Argument | Description |
|---|---|
|
|
The slug indicating the task to run, available from your task's page in the Render Dashboard:
Every task slug has the following format: For example: |
|
|
A list or dictionary containing the task's input arguments:
The For tasks that take zero arguments, provide an empty list, |
The workflows.start_task method returns an AwaitableTaskRun object as soon as the run is created. This object provides the run's id and initial status, which are both available immediately. You can await this object to wait for the run to complete, at which point all other properties are available.
For full options and details, see the Python SDK reference.
Use this method in synchronous execution contexts (such as a default Flask or Django app).
The following code demonstrates initializing the synchronous SDK client, triggering a task run, and waiting for the run to complete. See below for more details.
You trigger a task run by calling the synchronous client's workflows.start_task method. This method takes the following arguments:
| Argument | Description |
|---|---|
|
|
The slug indicating the task to run, available from your task's page in the Render Dashboard:
Every task slug has the following format: For example: |
|
|
A list or dictionary containing the task's input arguments:
The For tasks that take zero arguments, provide an empty list, |
The workflows.start_task method returns a TaskRun object as soon as the run is created. This object provides the run's id and initial status, which are both available immediately.
To wait for the run to complete, you can poll workflows.get_task_run until the run's status is one of completed, failed, or canceled. You can also use workflows.run_task instead of start_task to start and wait in one blocking call.
For full options and details, see the Python SDK reference.
Running with the Render API
The Render API provides an endpoint for triggering task runs, along with a variety of endpoints for retrieving workflow and task run details. The Render SDK uses the Render API behind the scenes, and you can also use it directly from your own code.
Start a task run by sending a POST request to the Run task endpoint. The JSON body for this request includes two properties:
| Property | Description |
|---|---|
|
Required. An identifier specifying the task to run. You can provide either of two identifiers, both of which are available from your task's page in the Render Dashboard:
|
|
Required. An array or object containing values for the task's input arguments.:
For a task that takes zero arguments, provide an empty list, |
Running manually
You can manually trigger task runs directly from the Render Dashboard and CLI. This is handy for testing and debugging new tasks.
Running tasks manually in the Render Dashboard
-
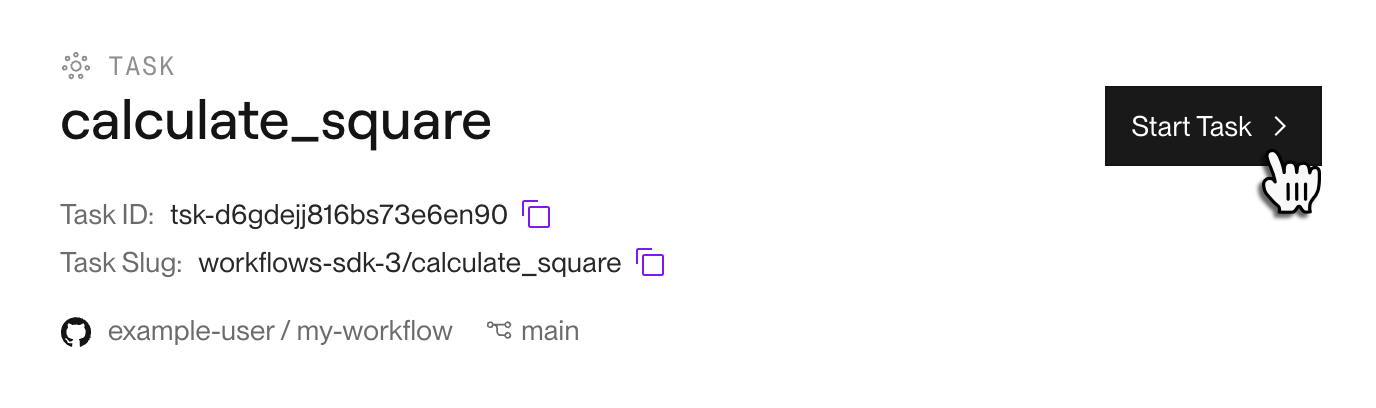
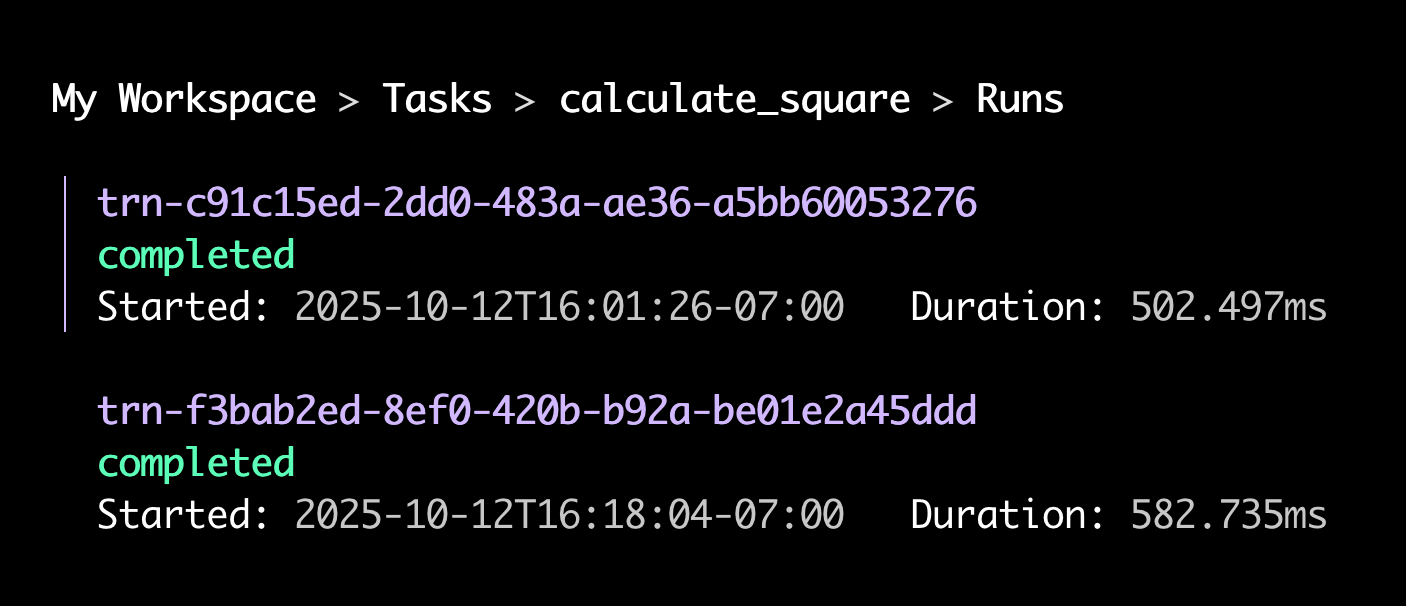
From your workflow's Tasks page in the Render Dashboard, click a task to open its Runs page.
-
Click Start Task in the top-right corner of the page:
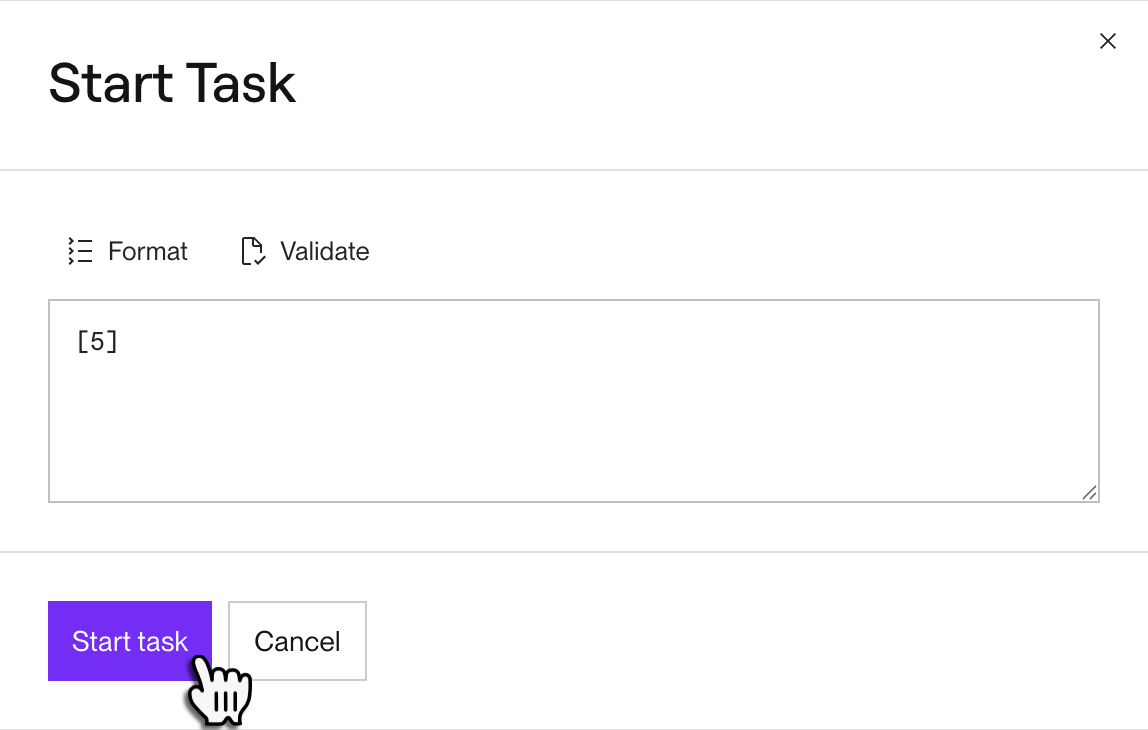
A dialog appears for providing the task's input arguments:
-
Provide the task's input arguments as a JSON array. Each array element maps to the task's corresponding positional argument.
For example, you can provide
[5]for a task that takes a single integer argument, or[]for a task that takes zero arguments.You can click Format and Validate to cleanly structure your input and confirm that it's valid JSON.
-
Click Start task.
Your new task run appears at the top of the Runs table.


Running manually with the Render CLI
-
Make sure your development machine has version 2.12.0 or later of the Render CLI:
If it doesn't, install the latest version.
-
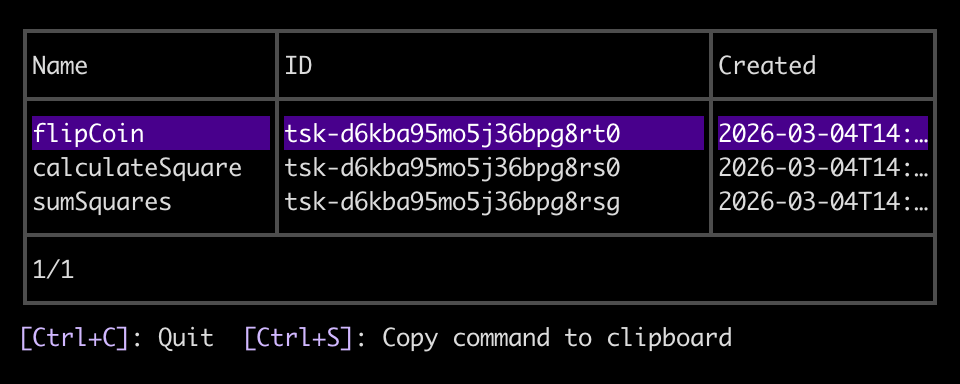
Run the following command:
The CLI opens an interactive menu of all workflow tasks in your workspace:
-
Select a task and press Enter, then select the
runcommand.The CLI prompts you to provide the task's input arguments as a JSON array:

-
Provide your desired arguments (or
[]for a task that takes zero arguments) and press Enter. The CLI kicks off your task with a request to the Render API and begins tailing its logs.You can remain in this view to view live logs from your task run.
-
Press Esc to navigate back up to the list of commands for your task. This time select the
runscommand.The CLI opens an interactive menu of the task's runs:
-
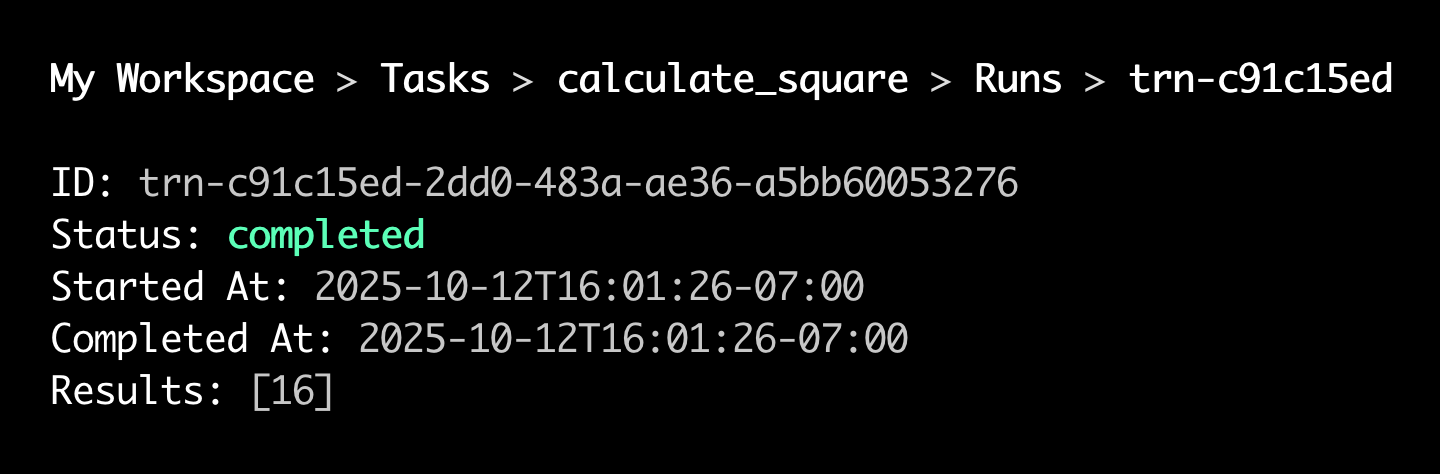
Select a run and press Enter, then select the
resultscommand.The CLI opens a view of the run's results: